Are you tired of a dingy, grimy shower that doesn’t sparkle? Deep cleaning your shower can seem like a daunting task, but with these expert hacks, you can transform your bathroom into a sparkling oasis. From removing hard water stains to eliminating mold and mildew, these simple yet effective techniques will leave your shower looking like new. So, grab your cleaning supplies and let’s get started on deep cleaning your shower!
Preparing for a Deep Shower Cleaning
Gathering Essential Supplies
To tackle a deep shower cleaning, you’ll need a few essential supplies. These supplies will help you get rid of soap scum, mildew, and other grime that have accumulated over time. Here’s a list of supplies you’ll need:
- Bucket
- Scrubbing sponge or non-abrasive sponge
- Non-abrasive shower cleaner or white vinegar
- Soft cloth or sponge
- Shower cap
- Squeegee or microfiber cloth
- Safety gloves
- Mop or mop head
- Dustpan and brush
- Elbow grease
Let’s take a closer look at each of these supplies:
- Bucket: You’ll need a sturdy bucket to mix your cleaning solution in. Make sure it’s large enough to hold the necessary amounts of water and cleaning solution.
- Scrubbing sponge or non-abrasive sponge: You’ll need a sponge to scrub away the grime and dirt. Choose a non-abrasive sponge to avoid scratching the surface of your shower.
- Non-abrasive shower cleaner or white vinegar: You’ll need a cleaning solution to tackle the soap scum and grime. You can use a non-abrasive shower cleaner or white vinegar. If you choose to use white vinegar, make sure to dilute it with water before applying it to your shower.
- Soft cloth or sponge: You’ll need a soft cloth or sponge to wipe down your shower after cleaning. This will help remove any remaining residue.
- Shower cap: You’ll need a shower cap to cover your showerhead while you clean it. This will help protect it from damage and keep your cleaning solution off the walls.
- Squeegee or microfiber cloth: You’ll need a squeegee or microfiber cloth to wipe down your shower walls and doors after cleaning. This will help remove any remaining water spots and streaks.
- Safety gloves: You’ll need safety gloves to protect your hands while cleaning. This is especially important when using harsh chemicals or abrasive sponges.
- Mop or mop head: You’ll need a mop or mop head to clean your shower floor. This will help you get into the corners and crevices where dirt and grime tend to accumulate.
- Dustpan and brush: You’ll need a dustpan and brush to clean up any messes you make while cleaning. This will help keep your bathroom tidy and prevent dirt from spreading.
- Elbow grease: Finally, you’ll need elbow grease to get your shower clean. This will help you scrub away the grime and dirt and get your shower looking sparkling clean.
Assessing Your Shower’s Condition
Before beginning a deep cleaning of your shower, it is important to assess its current condition. This will help you identify any damages or issues that need to be addressed before cleaning. Here are some steps to follow:
Visual Inspection for Damages
Start by visually inspecting your shower for any damages or wear and tear. Look for any cracks or chips in the tiles, grout, or fixtures. Pay attention to the seams between the tiles, as these are often where water can seep in and cause damage. Also, check for any loose tiles or fixtures that may need to be tightened or replaced.
Checking for Mold and Mildew
Mold and mildew can grow in damp areas, such as a shower, and can cause damage to the walls and tiles. Check for any signs of mold or mildew growth on the walls, floor, or around the showerhead. If you find any, it is important to address the issue before cleaning, as cleaning alone may not fully remove the mold or mildew. You may need to use a specialized cleaner or remove the tiles and resurface the area.
By assessing your shower’s condition, you can identify any issues that need to be addressed before cleaning. This will ensure that your shower is thoroughly cleaned and free of any damages or issues that may impact its overall appearance and functionality.
The Shower Cleaning Process
Removing Soap Scum and Hard Water Stains
Removing soap scum and hard water stains is an essential part of deep cleaning your shower. Here are some expert hacks to help you get rid of these unsightly buildups:
Step-by-step guide to remove soap scum
- Gather the necessary tools: You will need a non-abrasive cleaner, a sponge or cloth, and a scrubbing brush.
- Apply the cleaner: Squeeze a small amount of cleaner onto the sponge or cloth and apply it to the affected areas.
- Scrub gently: Use the sponge or cloth to scrub the soap scum gently. You may need to use a scrubbing brush to remove stubborn soap scum.
- Rinse thoroughly: After scrubbing, rinse the area thoroughly with water to remove any remaining cleaner.
- Dry the area: Use a clean towel to dry the area thoroughly.
Techniques for dealing with hard water stains
- Identify the stain: Identify the type of hard water stain you are dealing with. There are two types: mineral stains (from minerals in the water) and lime scale (from calcium and magnesium).
- Choose the right cleaner: Choose a cleaner that is specifically designed to remove the type of stain you are dealing with. For example, a cleaner with acidic properties can help remove mineral stains.
- Apply the cleaner: Apply the cleaner to the affected area and let it sit for the recommended amount of time.
- Scrub gently: Use a non-abrasive sponge or cloth to scrub the stain gently.
- Rinse thoroughly: After scrubbing, rinse the area thoroughly with water to remove any remaining cleaner.
- Dry the area: Use a clean towel to dry the area thoroughly.
Cleaning the Showerhead
When it comes to cleaning the showerhead, there are a few key things to keep in mind. First, it’s important to remove any mineral buildup that may have accumulated over time. This can be done by using a mixture of equal parts white vinegar and water, which can be sprayed onto the showerhead and left to sit for a few hours before rinsing off with water.
For plastic or metal showerheads, it’s important to use a gentle cleaning method to avoid damaging the surface. One effective method is to use a soft cloth or sponge to gently scrub away any grime or soap buildup. Avoid using abrasive cleaners or scrubbers, as these can scratch or damage the surface of the showerhead.
Additionally, it’s important to regularly clean the showerhead to prevent the buildup of bacteria and mold, which can cause unpleasant odors and even respiratory problems. By following these simple cleaning tips, you can keep your showerhead looking and functioning its best.
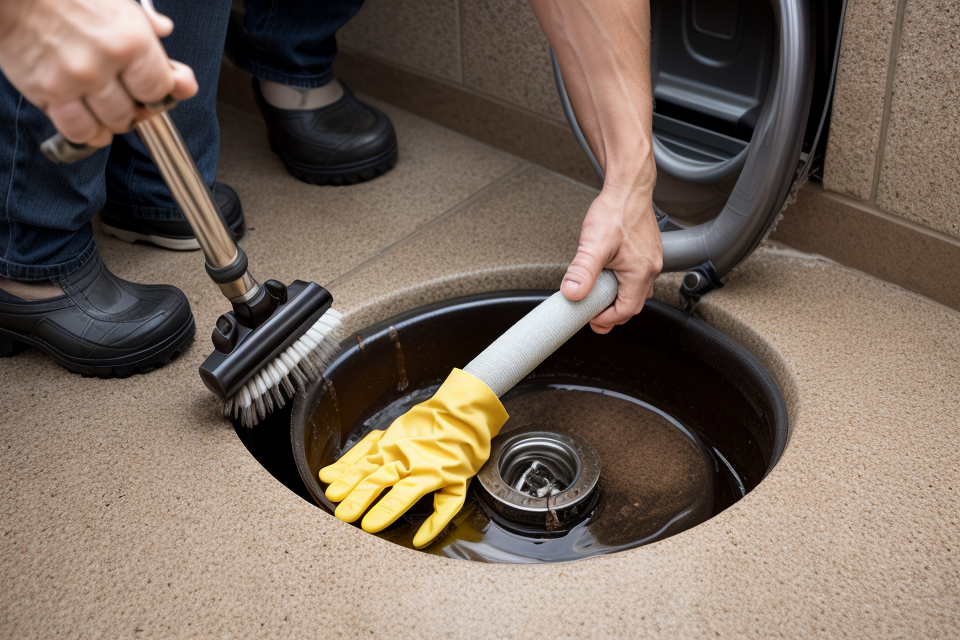
Deep Cleaning the Shower Tray
Deep cleaning the shower tray is a crucial step in ensuring a sparkling bathroom. Over time, the shower tray can accumulate mold, mildew, and soap scum, which can be difficult to remove. Here are some techniques for removing mold and mildew from a fiberglass or acrylic shower tray:
- Remove loose debris: First, remove any loose debris, such as soap or shampoo residue, from the shower tray. This can be done using a non-abrasive sponge or a soft cloth.
- Apply a cleaning solution: Mix equal parts of white vinegar and water in a spray bottle. Spray the cleaning solution onto the shower tray and let it sit for 15-20 minutes. The vinegar will help to break down the mold and mildew, making it easier to remove.
- Scrub the tray: Use a non-abrasive sponge or cloth to scrub the shower tray. Be sure to pay extra attention to any mold or mildew patches.
- Rinse thoroughly: After scrubbing, rinse the shower tray thoroughly with clean water to remove any remaining cleaning solution.
- Dry the tray: Use a clean towel to dry the shower tray completely. This will help to prevent any mold or mildew from returning.
By following these steps, you can deep clean your shower tray and enjoy a sparkling bathroom.
Cleaning the Shower Walls and Floor
Best practices for cleaning shower walls
- Scrubbing with a non-abrasive sponge or cloth
- Removing soap scum with a mixture of equal parts vinegar and water
- Rinse with warm water and dry with a clean towel
Methods for cleaning the shower floor
- Removing loose debris with a brush or broom
- Using a mixture of baking soda and water to remove stains and grime
In addition to these methods, it is important to regularly inspect and maintain the shower to prevent the buildup of dirt and grime. This can include wiping down the walls and floor after each use, as well as cleaning the showerhead to remove any mineral deposits that may have accumulated. By following these best practices, you can keep your shower looking sparkling clean and refreshed.
Restoring Shower Curtains and Liners
When it comes to deep cleaning your shower, restoring your shower curtains and liners is an essential step. Not only do they get worn out and stained over time, but they can also harbor bacteria and mold if not properly cleaned. Here are some tips for washing shower curtains and cleaning shower liners:
- Tips for washing shower curtains:
- Use a mild detergent or a curtain-specific cleaner.
- Wash the curtain in cold water to prevent shrinkage.
- Gently squeeze out excess water before washing.
- Tumble dry on low heat or hang to dry.
- Avoid bleach and fabric softener, as they can weaken the material.
- Methods for cleaning shower liners:
- Scrub away grime and mold with a mixture of equal parts water and vinegar.
- Use a plastic spatula to help loosen and remove any tough stains.
- Scrub in a circular motion to avoid damaging the liner.
- Rinse thoroughly with clean water.
- Allow the liner to air dry completely before reinstalling it in the shower.
By following these tips, you can keep your shower curtains and liners looking like new and prevent the growth of harmful bacteria and mold.
Maintaining a Clean Shower
- Regular cleaning is essential to maintain a clean shower.
- A schedule for maintaining a clean shower should be established.
Regular cleaning is a crucial aspect of maintaining a clean shower. It is important to keep the shower walls, doors, and floor free from soap scum, mildew, and other buildup that can accumulate over time. Not only does regular cleaning help to maintain a clean and hygienic bathroom, but it can also help to extend the life of your shower by preventing damage caused by hard water deposits and other buildup.
To establish a schedule for maintaining a clean shower, it is recommended to clean the shower at least once a week. This can be done by using a mixture of white vinegar and water to remove soap scum and other buildup. Alternatively, you can use a shower cleaner or a specialized cleaner designed specifically for use in the shower. It is also important to clean the shower after each use to prevent the buildup of soap and other substances.
Additionally, it is important to perform a deep cleaning of the shower every few months to remove any stubborn buildup that may have accumulated. This can be done by using a mixture of baking soda and water to scrub away soap scum and other buildup, followed by a thorough rinsing with water.
Overall, maintaining a clean shower requires regular cleaning and a commitment to keeping the shower clean and free from buildup. By following these tips, you can help to ensure that your shower stays clean and sparkling for years to come.
Additional Shower Cleaning Hacks
Using Baking Soda and Vinegar
Baking soda and vinegar are two natural cleaning agents that can be used to deep clean your shower. Here’s how to use them:
- Prepare the cleaning solution: Mix equal parts of baking soda and vinegar to form a paste. You can also add a little water to the mixture to create a more paste-like consistency.
- Apply the paste to the shower surface: Apply the paste to the shower surface using a sponge or cloth. Make sure to cover all areas, including the walls, floor, and doors.
- Allow the paste to sit: Allow the paste to sit on the surface for about 15-20 minutes. This will give the baking soda and vinegar time to penetrate the grout and dissolve any soap scum or hard water deposits.
- Scrub the surface: Use a soft-bristled brush or non-abrasive sponge to scrub the surface. The paste should come off easily, taking with it any dirt, grime, or stains.
- Rinse the surface: Rinse the surface thoroughly with water to remove any remaining paste.
- Dry the surface: Use a clean towel to dry the surface.
Using baking soda and vinegar to clean your shower has several advantages. First, it is a natural and eco-friendly way to clean your shower. Second, it is an effective way to remove soap scum, hard water deposits, and other stains. Finally, it is a budget-friendly option that can save you money compared to commercial cleaners.
Cleaning with a Shower Caddy
- Benefits of using a shower caddy for cleaning
A shower caddy can be a valuable tool in your cleaning arsenal. Not only does it help keep your shower organized, but it can also help you deep clean your shower more effectively. By using a shower caddy, you can easily reach those hard-to-reach areas and clean your shower without getting your hands wet.
- How to use a shower caddy for cleaning
To use a shower caddy for cleaning, follow these steps:
- Gather your supplies: You’ll need a shower caddy, a bucket or basin, some warm water, a cleaner or soap, and a sponge or cloth.
- Fill the bucket or basin with warm water: Fill the bucket or basin with warm water and add your chosen cleaner or soap.
- Place the shower caddy in the shower: Place the shower caddy in the shower and add the sponge or cloth to it.
- Clean the shower walls: Using the shower caddy as a scrubbing brush, scrub the shower walls with the sponge or cloth to remove any soap scum or grime.
- Rinse the shower walls: Rinse the shower walls with the water from the bucket or basin.
- Repeat as necessary: Repeat the process as necessary until the shower is clean.
- Dry the shower: Once the shower is clean, dry it thoroughly with a clean towel.
By using a shower caddy for cleaning, you can make your shower sparkling clean without having to get your hands wet or scrubbing vigorously.
Dealing with Caulking and Grout
Cleaning the caulking and grout in your shower can be a daunting task, but it’s an essential part of keeping your bathroom sparkling clean. Here are some tips for cleaning caulking and grout:
- Use a mix of vinegar and baking soda: This is a great all-purpose cleaner that can help remove dirt and grime from your caulking and grout. Mix equal parts of vinegar and baking soda, then apply the mixture to the affected area using a soft-bristled brush or cloth. Let it sit for a few minutes, then scrub the area with a non-abrasive sponge or cloth.
- Use a specialized grout cleaner: If you want to take a more targeted approach, you can use a specialized grout cleaner. These products are specifically designed to penetrate the porous grout lines and break down dirt and grime. Follow the instructions on the product packaging, and be sure to test it on a small, inconspicuous area first to ensure it won’t damage your grout.
- Remove mold and mildew: If you have mold or mildew growing in your caulking or grout, you’ll need to take extra steps to remove it. First, scrub the affected area with a mixture of equal parts vinegar and water, then apply a mild detergent and let it sit for a few minutes before rinsing with water. If the mold or mildew is particularly stubborn, you may need to use a mild bleach solution (1/2 cup of bleach per gallon of water) to kill the spores. Always test the solution on a small area first to ensure it won’t damage your caulking or grout.
By following these tips, you can keep your shower looking clean and sparkling, even in the most difficult-to-reach areas.
Cleaning Shower Accessories
- Keeping your shower accessories clean is just as important as cleaning the shower walls and floor. Dirt and grime can build up on shower handles, knobs, and towel racks, which can lead to the growth of bacteria.
- To clean shower handles and knobs, use a soft cloth and mild soap to wipe down the surfaces. If there is stubborn grime, use a mixture of equal parts water and vinegar, and let it sit on the surface for a few minutes before wiping it away with a clean cloth.
- For shower shelves and corner caddies, use a mixture of water and vinegar to clean the surfaces. Use a soft cloth to wipe down the surfaces, and make sure to remove any excess water before it drips onto the shower floor.
- If you have a glass shower door or enclosure, use a squeegee to remove any water spots or streaks. You can also use a microfiber cloth and a mixture of water and vinegar to clean the glass surfaces.
- Finally, make sure to dry all of your shower accessories thoroughly with a clean towel to prevent mold and mildew growth.
Final Thoughts
After following the steps outlined in this article, you should have a clean and sparkling shower. However, maintaining a clean shower is an ongoing process, and it’s important to keep up with regular cleaning to prevent the buildup of soap scum, mold, and mildew. Here are some final thoughts to keep in mind:
- Invest in good cleaning products: While DIY cleaners can be effective, investing in high-quality cleaning products can make the cleaning process easier and more efficient. Look for products that are specifically designed for shower cleaning and contain enzymes to break down soap scum and other tough stains.
- Don’t neglect the grout: Grout can be a breeding ground for mold and mildew, so it’s important to clean it regularly. Use a grout brush or a mixture of baking soda and water to scrub away any dirt and grime.
- Schedule regular cleanings: Make cleaning your shower a part of your regular routine. Whether you choose to clean it once a week or once a month, make sure to set aside time to keep your shower looking its best.
- Consider hiring a professional: If you’re short on time or simply don’t feel comfortable cleaning your shower, consider hiring a professional cleaning service. They have the tools and expertise to get your shower looking sparkling clean in no time.
By following these final thoughts, you can keep your shower looking clean and beautiful for years to come.
FAQs
1. What is deep cleaning a shower?
Deep cleaning a shower involves thoroughly cleaning and sanitizing the shower area, including the walls, floor, and doors. This is necessary to remove built-up soap scum, hard water stains, and other grime that can accumulate over time.
2. Why is it important to deep clean your shower?
Deep cleaning your shower is important because it helps to prevent the buildup of bacteria and mold, which can cause unpleasant odors and even health problems. It also helps to restore the shower to its original condition, making it look and feel cleaner and more invigorating.
3. What are some expert hacks for deep cleaning a shower?
Some expert hacks for deep cleaning a shower include using a mixture of vinegar and water to remove soap scum and hard water stains, using a shower squeegee to remove excess water after showering, and using a specialized shower cleaning product to help sanitize and refresh the shower.
4. How often should you deep clean your shower?
It is recommended to deep clean your shower at least once a month to keep it looking and feeling its best. However, this can vary depending on how often you use the shower and the level of cleanliness you desire.
5. What are some tips for maintaining a clean shower between deep cleanings?
Some tips for maintaining a clean shower between deep cleanings include wiping down the shower walls and doors after each use with a squeegee or sponge, using a shower caddy to keep soap and other items organized, and avoiding the use of harsh chemicals or abrasive cleaners that can damage the shower surfaces.


