Cleaning the toilet and bathroom may not be the most glamorous task, but it’s an essential part of maintaining a hygienic and pleasant living space. Whether you’re dealing with stubborn stains or just looking to freshen up the room, this guide will provide you with all the tips and tricks you need to know to properly clean your toilet and bathroom. From choosing the right cleaning products to tackling hard-to-reach areas, we’ve got you covered. So grab a mop and let’s get started!
Preparing for Cleaning
Gathering Supplies
- Toilet brush: A toilet brush is essential for cleaning the hard-to-reach areas of the toilet bowl. Make sure to choose a brush with sturdy bristles that can withstand the tough cleaning job.
- Cleaning solution: There are many types of cleaning solutions available in the market, but it’s best to opt for an eco-friendly and biodegradable solution that won’t harm the environment. Some common cleaning solutions include white vinegar, baking soda, and hydrogen peroxide.
- Scouring sponge: A scouring sponge is useful for scrubbing away tough grime and stains on the toilet bowl. Make sure to choose a sponge that is tough enough to handle the job but gentle enough not to scratch the porcelain.
- Bucket: A bucket is necessary for mixing the cleaning solution and for holding the mop or cloth during cleaning. Make sure to choose a bucket that is large enough to hold the necessary amount of solution.
- Mop: A mop is necessary for cleaning the floor and other surfaces in the bathroom. Make sure to choose a mop that is soft enough not to scratch the floor but tough enough to remove dirt and grime.
- Microfiber cloths: Microfiber cloths are useful for wiping down surfaces and removing excess moisture after cleaning. They are also great for cleaning mirrors and other glass surfaces. Make sure to choose cloths that are soft and absorbent.
Protecting Fixtures
When it comes to cleaning your toilet and bathroom, one of the most important steps is to protect your fixtures. Here are some ways to do so:
Covering the toilet seat
The toilet seat is one of the most commonly used fixtures in the bathroom, and it’s also one of the most difficult to clean. To protect it during cleaning, you should cover it with a plastic sheet or a towel. This will prevent any cleaning solutions or debris from coming into contact with the seat, which can cause damage over time.
Removing towels from the rack
If you have a towel rack in your bathroom, it’s important to remove the towels before cleaning. Towels can absorb dirt and grime, which can make them difficult to clean. By removing them from the rack, you’ll make it easier to clean the rack itself and prevent any damage to the towels.
Putting a plastic sheet on the floor
When cleaning your bathroom, it’s important to protect your floors from any spills or spills. To do this, you can put a plastic sheet on the floor before cleaning. This will help to contain any messes and make it easier to clean up afterwards. You can also use a plastic sheet to protect your bathroom furniture, such as your vanity or cabinet.
Cleaning the Toilet
Dismantling the Toilet
Before you begin cleaning your toilet, it’s important to dismantle it properly. Here are the steps you need to follow:
- Unbolting the toilet from the floor
The first step in dismantling your toilet is to unbolt it from the floor. This is necessary because the weight of the toilet can make it difficult to move or remove. To unbolt the toilet, you will need to locate the bolts that hold it in place. These bolts are usually located at the base of the toilet and may be hidden by the floor. Use a wrench or an adjustable spanner to loosen the bolts, and then carefully pull the toilet away from the floor.
- Removing the water tank lid
Next, you will need to remove the water tank lid. This is typically located on the back of the toilet and can be unscrewed using a screwdriver. Once you have removed the lid, you can access the inside of the tank and begin cleaning.
- Disconnecting the water supply line
Finally, you will need to disconnect the water supply line. This is the tube that connects the toilet to the water supply line and is usually located on the back of the toilet. Use a wrench to loosen the nut that holds the line in place, and then disconnect the line from the toilet. This will allow you to clean the inside of the toilet without worrying about water spilling out.
By following these steps, you can properly dismantle your toilet and prepare it for cleaning. Remember to be careful when handling the toilet, as it can be heavy and difficult to move.
Cleaning the Bowl
Cleaning the bowl is an essential part of keeping your toilet clean and hygienic. Here are some steps to follow:
- Scrubbing the bowl with a scouring sponge
- Scrubbing the bowl with a scouring sponge is an effective way to remove stubborn stains and grime.
- Make sure to use a non-abrasive sponge to avoid scratching the porcelain surface of the bowl.
- Work the sponge in a circular motion, focusing on the areas with the most visible stains.
- Rinse the sponge frequently with water to avoid leaving residue on the bowl.
- Brushing the bowl with a toilet brush
- After scrubbing the bowl with a scouring sponge, it’s important to brush the bowl with a toilet brush to remove any remaining debris.
- A toilet brush has stiff bristles that can reach into the corners of the bowl and scrub away stubborn grime.
- Start at the bottom of the bowl and work your way up, brushing in a circular motion.
- Pay extra attention to the areas around the water line, as this is where most of the stains tend to accumulate.
- Pouring a cleaning solution into the bowl
- After scrubbing and brushing the bowl, pour a cleaning solution into the bowl.
- Choose a cleaning solution that is safe for use on porcelain and won’t damage the surface of the bowl.
- Follow the instructions on the packaging for the recommended amount of solution to use.
- Allow the solution to sit for a few minutes to let it penetrate the grime and stains.
- Scrubbing the bowl again
- After letting the cleaning solution sit for a few minutes, scrub the bowl again with a scouring sponge.
- The solution should have loosened the grime and stains, making them easier to remove.
- Continue scrubbing in a circular motion until the bowl is clean and free of debris.
- Rinse the bowl thoroughly with water to remove any remaining cleaning solution.
By following these steps, you can keep your toilet bowl clean and free of grime and stains. Remember to clean the toilet regularly to maintain a hygienic bathroom environment.
Cleaning the Rim and Lid
Using a Microfiber Cloth to Wipe Down the Rim and Lid
- Start by using a clean microfiber cloth to wipe down the rim and lid of the toilet bowl.
- Use a gentle, circular motion to remove any loose debris or dirt.
- Make sure to focus on any areas with visible stains or buildup.
Applying a Cleaning Solution to the Rim and Lid
- Once you have removed any loose debris, apply a cleaning solution to the rim and lid of the toilet bowl.
- You can use a store-bought toilet bowl cleaner or make your own using a mixture of water and white vinegar.
- Make sure to read the instructions on the cleaner and follow them carefully.
Letting it Sit for a Few Minutes
- After applying the cleaning solution, let it sit on the rim and lid for a few minutes.
- This will allow the cleaner to penetrate any tough stains or buildup.
- The recommended time will depend on the specific cleaner you are using.
Rinsing with Water
- Once the cleaning solution has sat for a few minutes, use a clean bucket of water to rinse the rim and lid thoroughly.
- Make sure to remove any remaining cleaner and rinse off any remaining residue.
- Use a clean microfiber cloth to wipe down the rim and lid to remove any excess water.
Remember, when cleaning the rim and lid of your toilet, it’s important to be thorough and patient. By following these steps, you can ensure that your toilet is thoroughly clean and free of any buildup or stains.
Cleaning the Floor
Cleaning the floor of your toilet is an essential part of maintaining a hygienic bathroom. Follow these steps to ensure that your toilet floor is free from dirt and grime:
- Sweeping or vacuuming the floor: The first step in cleaning the floor is to remove any loose dirt, dust, or debris. Use a broom or a vacuum cleaner to sweep or vacuum the floor thoroughly.
- Moping the floor with a cleaning solution: After sweeping or vacuuming, it’s time to mop the floor with a cleaning solution. Mix equal parts of water and white vinegar or use a store-bought cleaning solution. Be sure to read the label for the recommended usage and dilution ratio.
- Rinsing with water: Once you have mopped the floor with the cleaning solution, use a clean mop or cloth to rinse the floor with clean water. Make sure to remove any excess water by blotting with a clean towel.
Remember to work carefully when cleaning around the toilet bowl, as some cleaning solutions can be slippery. Always work with well-ventilated areas, and never mix cleaning solutions, as this can cause harmful fumes.
After completing these steps, your toilet floor should be clean and free from dirt and grime, providing a hygienic environment for you and your family.
Reassembling the Toilet
After thoroughly cleaning the various components of your toilet, it’s time to put everything back together. Here’s a step-by-step guide to reassembling your toilet:
Reconnecting the water supply line
- Turn off the water supply to your toilet by closing the shut-off valve, which is usually located under the sink or in the basement.
- Disconnect the water supply line from the shut-off valve.
- Attach the water supply line to the shut-off valve, ensuring that it is securely connected.
- Turn the shut-off valve back on to test the water supply line.
Reattaching the toilet to the floor
- Lift the toilet off the floor and set it aside.
- Inspect the floor for any loose tiles or flooring material that may need to be repaired before reattaching the toilet.
- Apply a generous amount of waterproof sealant around the base of the toilet where it meets the floor.
- Carefully lower the toilet back onto the floor, making sure it is centered and secure.
Replacing the water tank lid
- Lift the toilet seat and lid to access the water tank.
- Remove the old water tank lid and set it aside.
- Clean the water tank and the lid with a disinfectant solution, ensuring that all surfaces are thoroughly cleaned.
- Apply a fresh coat of waterproof sealant to the underside of the new water tank lid.
- Carefully place the new water tank lid onto the water tank, making sure it is securely attached.
- Lower the toilet seat and lid back into place, securing them to the toilet bowl.
By following these steps, you can successfully reassemble your toilet and return it to its original condition. Remember to inspect your work for any areas that may require additional cleaning or maintenance before considering your toilet fully cleaned and sanitized.
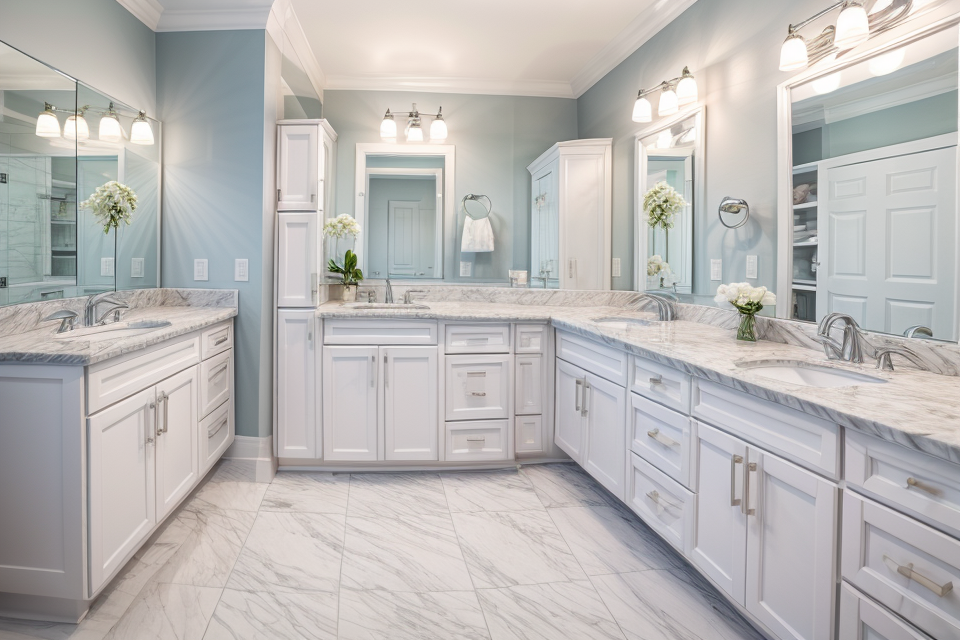
Cleaning the Bathroom
Cleaning the Sink
Scrubbing the Sink with a Scouring Sponge
Before starting the cleaning process, it is important to gather all the necessary tools and supplies. This includes a scouring sponge, which is an essential cleaning tool for removing tough stains and grime from the sink. Start by wetting the sponge with warm water and adding a few drops of mild dish soap.
Brushing the Sink with a Toilet Brush
After scrubbing the sink with a scouring sponge, it’s time to move on to the next step – brushing the sink with a toilet brush. This may seem like an unusual step, but a toilet brush is actually the perfect tool for cleaning the hard-to-reach areas of the sink, such as the corners and edges.
Pouring a Cleaning Solution into the Sink
Once the sink has been scrubbed and brushed, it’s time to pour a cleaning solution into the sink. There are many different types of cleaning solutions available, ranging from store-bought products to homemade remedies. Choose a solution that is safe for your sink material and avoid using abrasive or harsh chemicals.
After pouring the cleaning solution into the sink, it’s important to let it sit for a few minutes before rinsing it off. This allows the solution to penetrate the grime and stains, making it easier to remove them during the rinsing process. Follow the instructions on the cleaning solution packaging for the recommended amount of time to let it sit.
Once the cleaning solution has sat for a few minutes, it’s time to rinse the sink with water. Use a clean cloth or sponge to wipe away the solution and remove any remaining grime and stains. If there are still stubborn stains or grime, repeat the cleaning process as necessary until the sink is completely clean.
Remember to always work with cleaning solutions and tools in a well-ventilated area and wear appropriate protective gear, such as gloves, to avoid skin irritation or other adverse reactions. With these steps, your sink will be sparkling clean and ready for use.
Cleaning the Shower and Bathtub
Cleaning the shower and bathtub is an essential part of maintaining a clean and hygienic bathroom. Here are some steps to follow when cleaning the shower and bathtub:
- Scrubbing the shower and bathtub with a scouring sponge: Use a scouring sponge to scrub away any soap scum, hard water stains, or grime that has accumulated on the shower and bathtub. Be sure to focus on the corners and any areas with heavier buildup.
- Brushing the shower and bathtub with a toilet brush: A toilet brush can be used to scrub the harder-to-reach areas of the shower and bathtub, such as the drain and the edges. This will help to remove any lingering dirt and grime.
- Pouring a cleaning solution into the shower and bathtub: After scrubbing the shower and bathtub, pour a cleaning solution into the shower and bathtub. This can be a commercial bathroom cleaner or a DIY solution made from vinegar and water. Allow the solution to sit for a few minutes, which will give it time to penetrate and break down any remaining grime.
- Letting it sit for a few minutes: Allow the cleaning solution to sit for a few minutes so that it can penetrate and break down any remaining grime. This will make it easier to remove the dirt and grime when you rinse the shower and bathtub.
- Rinsing with water: After the cleaning solution has sat for a few minutes, use a sponge or cloth to rinse the shower and bathtub with water. Be sure to rinse thoroughly to remove all the cleaning solution. If you notice any stubborn grime or stains, you may need to repeat the cleaning process or use a different cleaning solution.
It’s important to clean the shower and bathtub regularly to prevent the buildup of dirt and grime, which can lead to unpleasant odors and bacteria growth. By following these steps, you can keep your bathroom clean and hygienic.
Cleaning the Mirrors
Cleaning the mirrors is an essential part of maintaining a clean and hygienic bathroom. Follow these steps to ensure your mirrors are spotless:
- Gather your supplies: You will need a microfiber cloth, a cleaning solution, and water.
- Wipe down the mirrors with a microfiber cloth: Use the cloth to remove any smudges or fingerprints from the mirrors.
- Apply a cleaning solution to the mirrors: Spray a cleaning solution onto a soft cloth and wipe it across the mirror surface. The cleaning solution will help to break down dirt and grime that may be difficult to remove with just water.
- Let it sit for a few minutes: Allow the cleaning solution to sit on the mirrors for a few minutes so that it can penetrate any stubborn grime.
- Rinse with water: Use a clean cloth to wipe away any remaining cleaning solution and water from the mirrors.
- Dry the mirrors: Use a clean towel or microfiber cloth to dry the mirrors thoroughly.
By following these steps, you can ensure that your bathroom mirrors are clean and free of smudges and grime. Remember to clean your mirrors regularly to maintain a hygienic bathroom environment.
Cleaning the Floors
- Sweeping or vacuuming the floors:
- Sweeping or vacuuming the floors is the first step in cleaning the bathroom.
- It is important to remove any dirt, dust, or debris that may have accumulated on the floor.
- Use a broom or a vacuum cleaner to sweep or vacuum the floors thoroughly.
- Pay attention to the corners and edges of the room, as they tend to accumulate more dirt and dust.
- Moping the floors with a cleaning solution:
- After sweeping or vacuuming the floors, it is important to mop them with a cleaning solution.
- This helps to remove any remaining dirt, dust, or stains on the floor.
- Mix a solution of water and a suitable cleaning agent, such as bleach or vinegar, in a bucket.
- Use a mop to apply the cleaning solution to the floor, making sure to cover the entire surface.
- Allow the cleaning solution to sit on the floor for a few minutes before rinsing it off with water.
- Rinsing with water:
- After mopping the floors with a cleaning solution, it is important to rinse them with water to remove any remaining cleaning solution.
- Use a clean, damp cloth or mop to rinse the floors thoroughly.
- Make sure to rinse the floors well, as any remaining cleaning solution can leave a residue that is difficult to remove.
- Dry the floors with a clean towel or let them air dry.
By following these steps, you can effectively clean the floors in your bathroom and remove any dirt, dust, or stains that may have accumulated. Remember to use suitable cleaning agents and to rinse the floors thoroughly with water to ensure a clean and hygienic bathroom.
Drying and Putting Away Supplies
Drying the Towels
Drying the towels is an essential part of the cleaning process as it helps to prevent the growth of mold and mildew. To dry the towels, you should hang them up in a well-ventilated area, away from direct sunlight. This will allow the towels to dry evenly and prevent them from becoming musty.
It is important to avoid stacking the towels on top of each other as this can cause them to become wrinkled and difficult to dry. Instead, you should fold the towels neatly and place them in a pile, with plenty of space between each towel to allow for proper air circulation.
Once the towels are dry, you should check them for any signs of mold or mildew growth. If you notice any signs of mold or mildew, you should wash the towels again before storing them away.
Putting Away the Cleaning Supplies
After cleaning the bathroom, it is important to put away the cleaning supplies in a designated area. This will help to keep the bathroom organized and prevent the cleaning supplies from cluttering up the room.
To put away the cleaning supplies, you should first sort them into categories, such as bathroom cleaners, disinfectants, and scrubbers. You should then place each category of supplies in a labeled container or basket, so that they are easy to find and use when needed.
It is important to avoid storing the cleaning supplies in areas where they can come into contact with water or moisture, as this can cause them to become damaged or contaminated. Instead, you should store the cleaning supplies in a dry, well-ventilated area, away from direct sunlight.
Restoring the Bathroom to Its Original State
After cleaning the bathroom and putting away the cleaning supplies, you should take steps to restore the bathroom to its original state. This may include wiping down surfaces, putting away personal items, and turning off the lights.
It is important to take the time to restore the bathroom to its original state, as this will help to keep the bathroom clean and organized. By taking a few simple steps, you can ensure that the bathroom is ready for the next use.
FAQs
1. What is the proper way to clean the toilet and bathroom?
Cleaning the toilet and bathroom is an essential part of maintaining a clean and hygienic home. The proper way to clean the toilet and bathroom involves several steps, including:
* Preparation: Before cleaning, gather all the necessary supplies, including cleaning solutions, scrubbers, and cloths. It’s also a good idea to put on protective gloves to avoid coming into contact with harmful bacteria.
* Removing waste: The first step in cleaning the toilet is to remove any solid waste from the bowl. Use a plunger or toilet brush to scrape away any debris.
* Cleaning the bowl: Next, use a toilet bowl cleaner to thoroughly clean the bowl. Be sure to follow the instructions on the label carefully.
* Cleaning the tank: After the bowl is clean, turn off the water supply to the toilet and flush the toilet to remove any excess cleaner. Use a toilet tank cleaner to clean the inside of the tank, paying special attention to the rim and flush valve.
* Cleaning the bathroom: Once the toilet is clean, move on to cleaning the rest of the bathroom. This includes wiping down the walls, floor, and countertops with a cleaning solution and water.
* Drying and disinfecting: After cleaning, dry the bathroom thoroughly with a clean cloth or paper towels. You can also use a disinfectant spray to kill any remaining germs.
2. How often should I clean my toilet and bathroom?
It’s recommended to clean your toilet and bathroom at least once a week. However, if you have a busy household with multiple people using the bathroom, you may need to clean more frequently.
3. What are some tips for cleaning the hard-to-reach areas of my toilet and bathroom?
Cleaning the hard-to-reach areas of your toilet and bathroom can be challenging, but there are a few tips that can make the process easier:
* Use a ladder: If you need to clean the top of the toilet or the ceiling of the bathroom, use a ladder to safely reach those areas.
* Use a long-handled brush: A long-handled brush can help you clean the sides of the toilet bowl without having to lean over.
* Use a toilet brush with a removable head: A toilet brush with a removable head can be easily disassembled for cleaning, making it easier to reach all the nooks and crannies.
* Use a bathroom cleaner spray: A bathroom cleaner spray can be used to reach high up areas, and it will also help you to disinfect the area.
4. What are some natural cleaning alternatives that I can use to clean my toilet and bathroom?
There are several natural cleaning alternatives that you can use to clean your toilet and bathroom, including:
* Baking soda: Baking soda is a great natural cleaning agent that can be used to clean the toilet bowl and bathroom surfaces. Sprinkle baking soda on the toilet bowl and let it sit for a few hours before scrubbing it away with a wet cloth.
* Vinegar: Vinegar is another natural cleaning agent that can be used to clean the toilet and bathroom. Mix equal parts of vinegar and water in a spray bottle and use it to clean the surfaces.
* Lemon juice: Lemon juice is a natural bleach that can be used to clean the toilet and bathroom. Mix lemon juice with water and use it to clean the surfaces.
5. How can I prevent the spread of germs in my bathroom?
To prevent the spread of germs in your bathroom,
